


How quickly can your fretting hand switch from one chord to another? The speed and confidence you have in making chord changes will be key to further mastering the guitar and successfully playing and creating music for the instrument.
The key to learning any instrument, like most intricate human activity, is to develop brain and muscle coordination, more commonly called, muscle memory needed to play the instrument.
If you picture a basketball player, for instance, the key to a good shooting performance is the proper hand-to-eye coordination in order to bring the ball up, prepare, aim, and throw it towards the hoop.
The different muscles of the arms, wrist and hands will learn the right movements and strength needed to score. Constant practice will condition the brain, eyes, and entire body to know the routine of shooting the ball.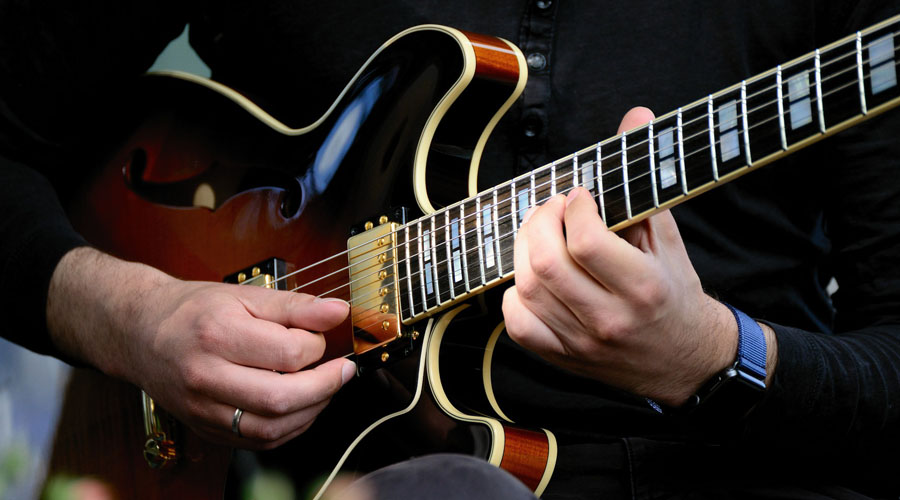
This is similar to guitar playing. The muscles involved would be the arms, wrists and the fingers, with the eyes, ears and brain working in unison to relate the movements to the music being read and the notes produced by the guitar. This is the mechanism that works when a guitar player starts to change chords.
Luckily, there are simple techniques that can help the beginning guitar player to develop these muscle memories and ear training for proper chord changes. Read below and you will see that chord changes are not that difficult to do.

When changing chords, first memorize all the chords involved in the song, and then visualize exactly which fingers of the fretting hand are involved in playing the chords.
When playing simple barre chords, the most important finger is the index finger, which will squeeze all 6 strings across the fretboard. So as you move towards playing the chord, you have to position the index finger across the proper fret, or place, along the fretboard before positioning the other fingers of the chord.
When playing a broken or simple chord, it is usually the index finger that is the most important finger. Primarily, the index finger and the thumb will form a stable anchor on the guitar neck in order for the other fingers to press the other strings of the chord.
The index finger is usually played on the lowest fret and the highest string (by pitch, or string 1), where it could more easily find the proper note, and the other fingers can follow to complete the chord.
When playing a particular song, keep time with the music, but anticipate in which bar and on which beat the next chord will continue. For beginners, it would be preferable to practice the entire song slowly from beginning to end, taking care to change to each chord on time and on tempo.
When the student can play the entire song like this without chord errors, he can start increasing the speed to the songs proper tempo. It would also be helpful to identify particularly tricky chord changes.
For instance, 2 consecutive bar graphs would be a relatively simple change, because the guitar player needs only to slide his index finger (which is already in the barre position) to its proper position on the fretboard and quickly press in the other strings of the chord.
Changes from simple chords to barre chords and vice versa and chords that are positioned at a far distance from each other along the length of the neck are more difficult to perform. Isolate these difficult changes and practice those chord changes.
If it is still to difficult with the slow tempo, dont play the last beat of the last chord and use the time to move your fret hand into position for the next fret. Keep practicing these changes until the short passage can be played without error.
Afterwards, go back to playing the entire song as discussed above. When you can play an entire song properly, try different strumming styles to accentuate parts of the song, or a particular beat; or alternate strumming and light plucking to give volume and variety to the music of the song.
First, it is best to complete the song by actually copying how the original artist played it on the guitar; then you can add your own twists and extra technique according to your ear and taste. This will help you develop your hands for more difficult chords and finger playing techniques.
Do this for every song, and before you know it, youll be playing a new song like a seasoned guitarist in a short period of time.

